Welcome to Persistent.ID
  • Intentwave
    • 🖥️Dashboard Registration
    • ⚙️Install the Pixel
      • How to install using Wix
      • How to install using Shopify
      • How to install using Wordpress
      • How to install using Webflow
      • How to install on Google Tag Manager
      • How to install on Go High Level
      • How to install on ClickFunnel
    • 🔗Platform Integration
      • Klaviyo Integration
      • Convesio Convert Integration
      • Webhooks
      • Webhook Into Zapier
      • ClickFunnels
    • 🔏Consent Management
      • Compliance Set Up
      • IntentWave Privacy and Compliance
    • 🤔Product FAQ
      • How to download the performance report and visitor CSV?
      • How to customize the view?
      • How to manage multiple websites?
      • How to track sources and destinations using UTM Parameters?
      • How to grant website permissions?
      • How to purchase and allocate leads?
      • How to adjust the lead reselling price?
      • What is a suppression list?
      • What if I forgot my Termly password?
    • 🛠️Troubleshooting
Powered by GitBook
On this page
  1. Intentwave
  2. Product FAQ

How to grant website permissions?

Whenever you want to grant dashboard access to someone else, whether it's your colleague or client, we've made the process simple. This ensures you and other stakeholders can share firsthand insights

PreviousHow to track sources and destinations using UTM Parameters?NextHow to purchase and allocate leads?

Last updated 4 months ago

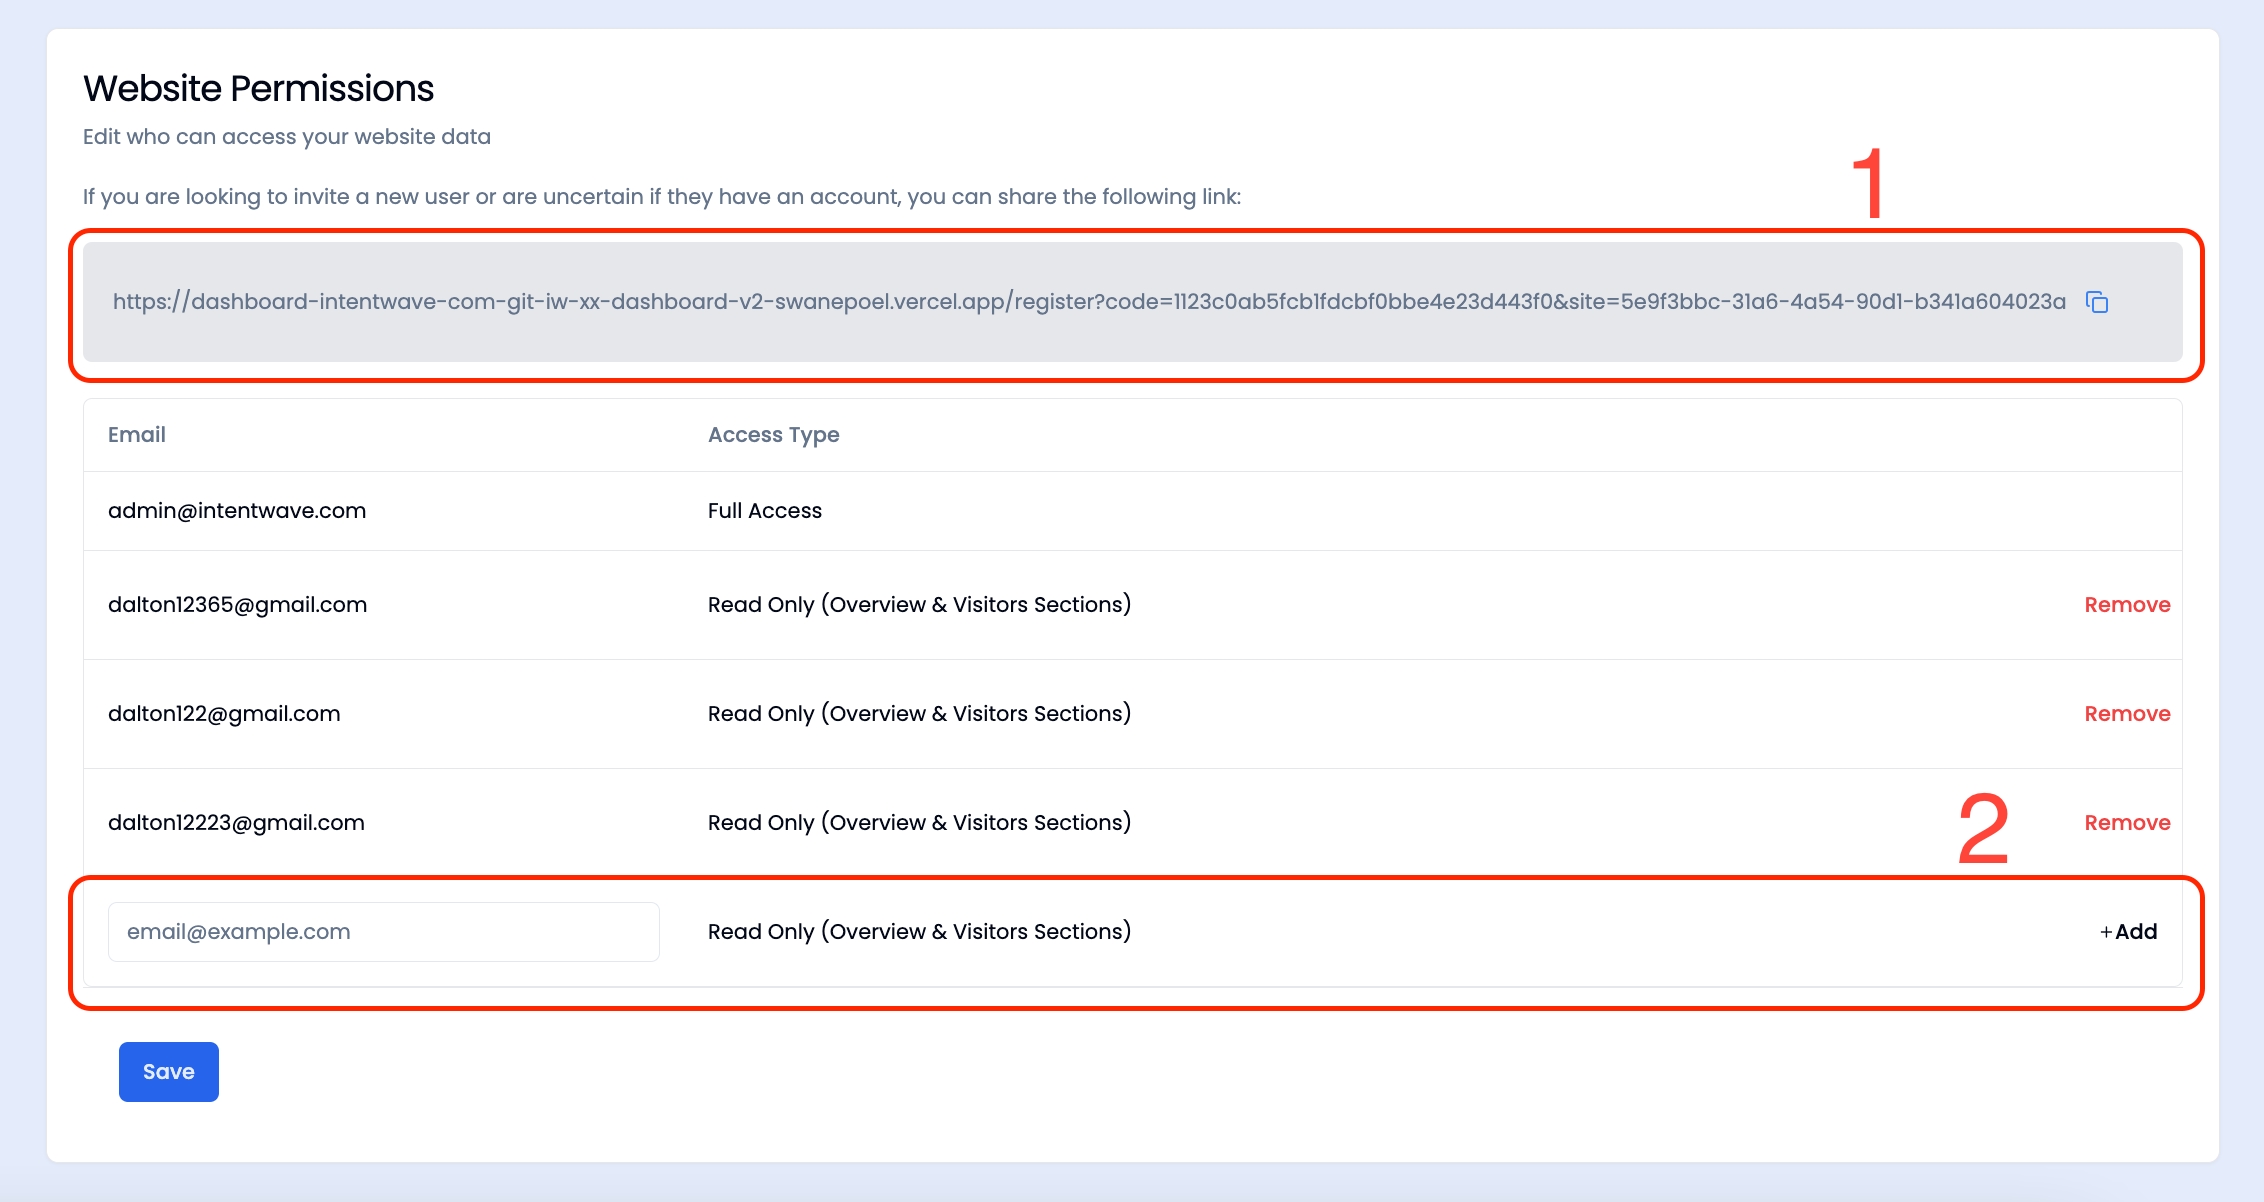
Go to [Site Settings] and scroll down to the [Website Permissions] section.

You can grant the permission in two ways:

  1. Copy the link in the gray box and share it with the people you want to grant access to.

  2. Alternatively, you can manually input their email and click Save. To add more users, click Add. As the account owner, you can also remove access for any granted users by clicking Remove at any time.

🤔