
Klaviyo Integration
Welcome to the integration instruction for Klaviyo
The estimated set-up time is: 2 mins
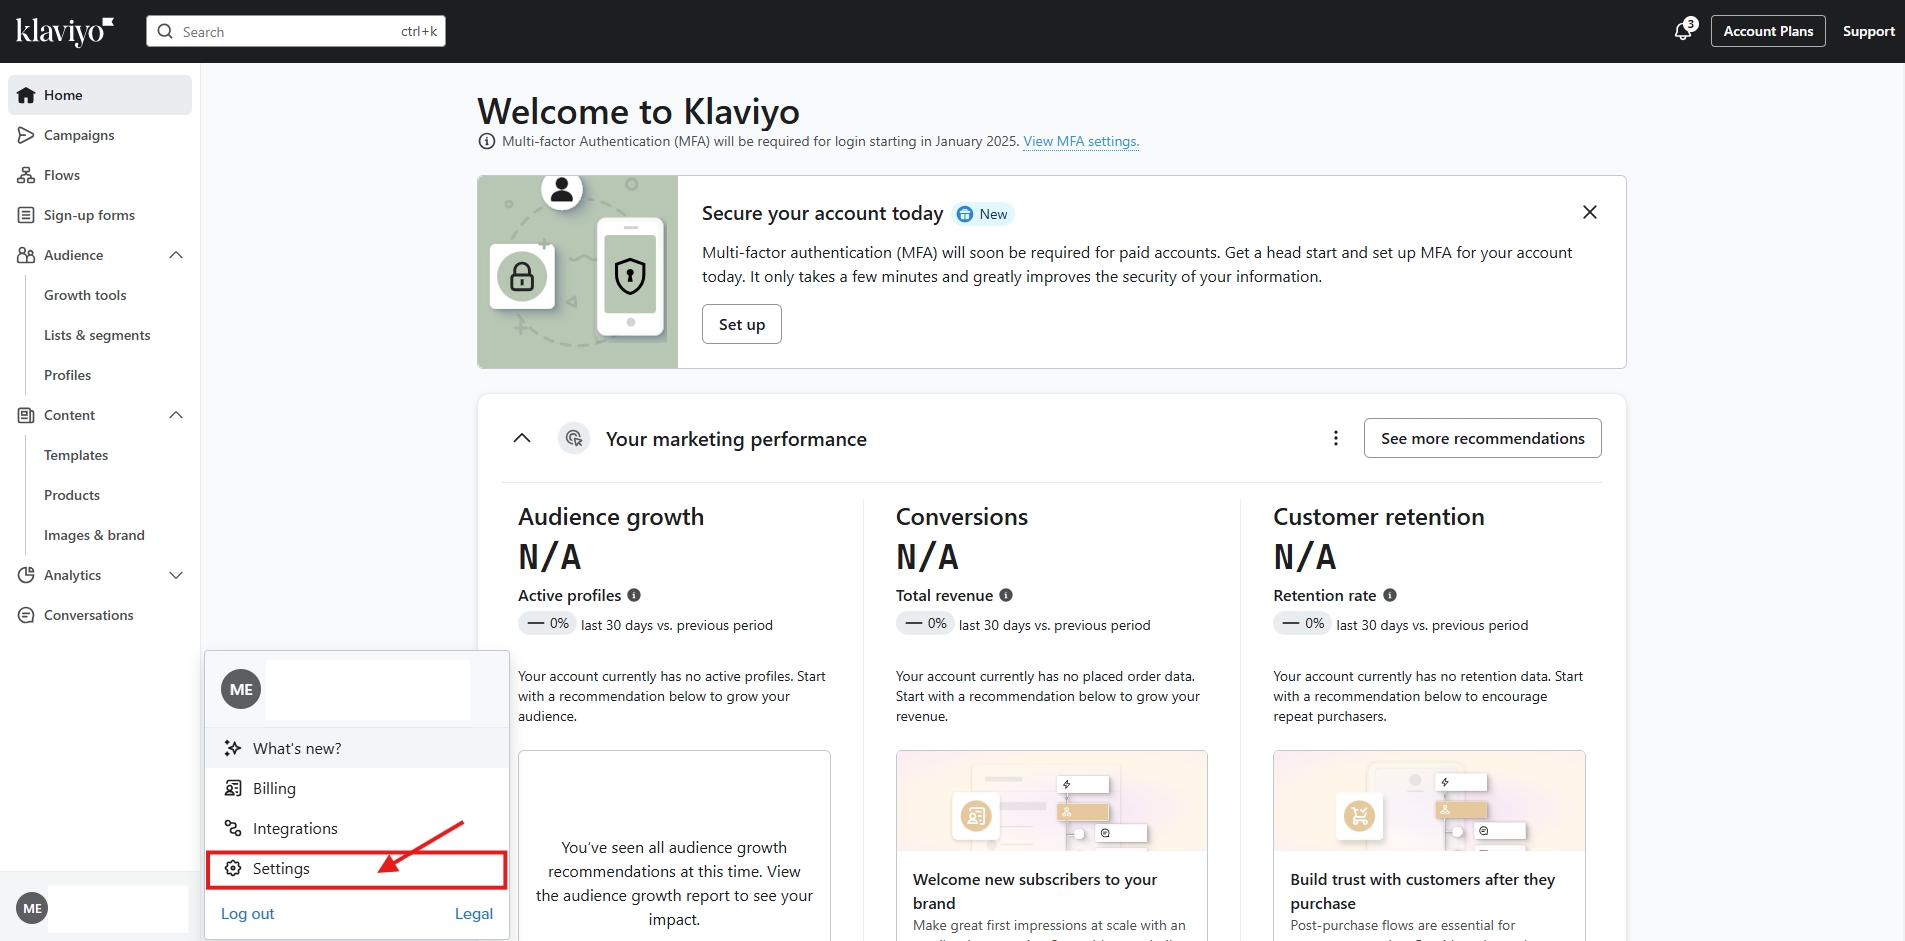
Step 1
Go to Settings: Navigate to the settings tab in the bottom left corner of your Klaviyo account
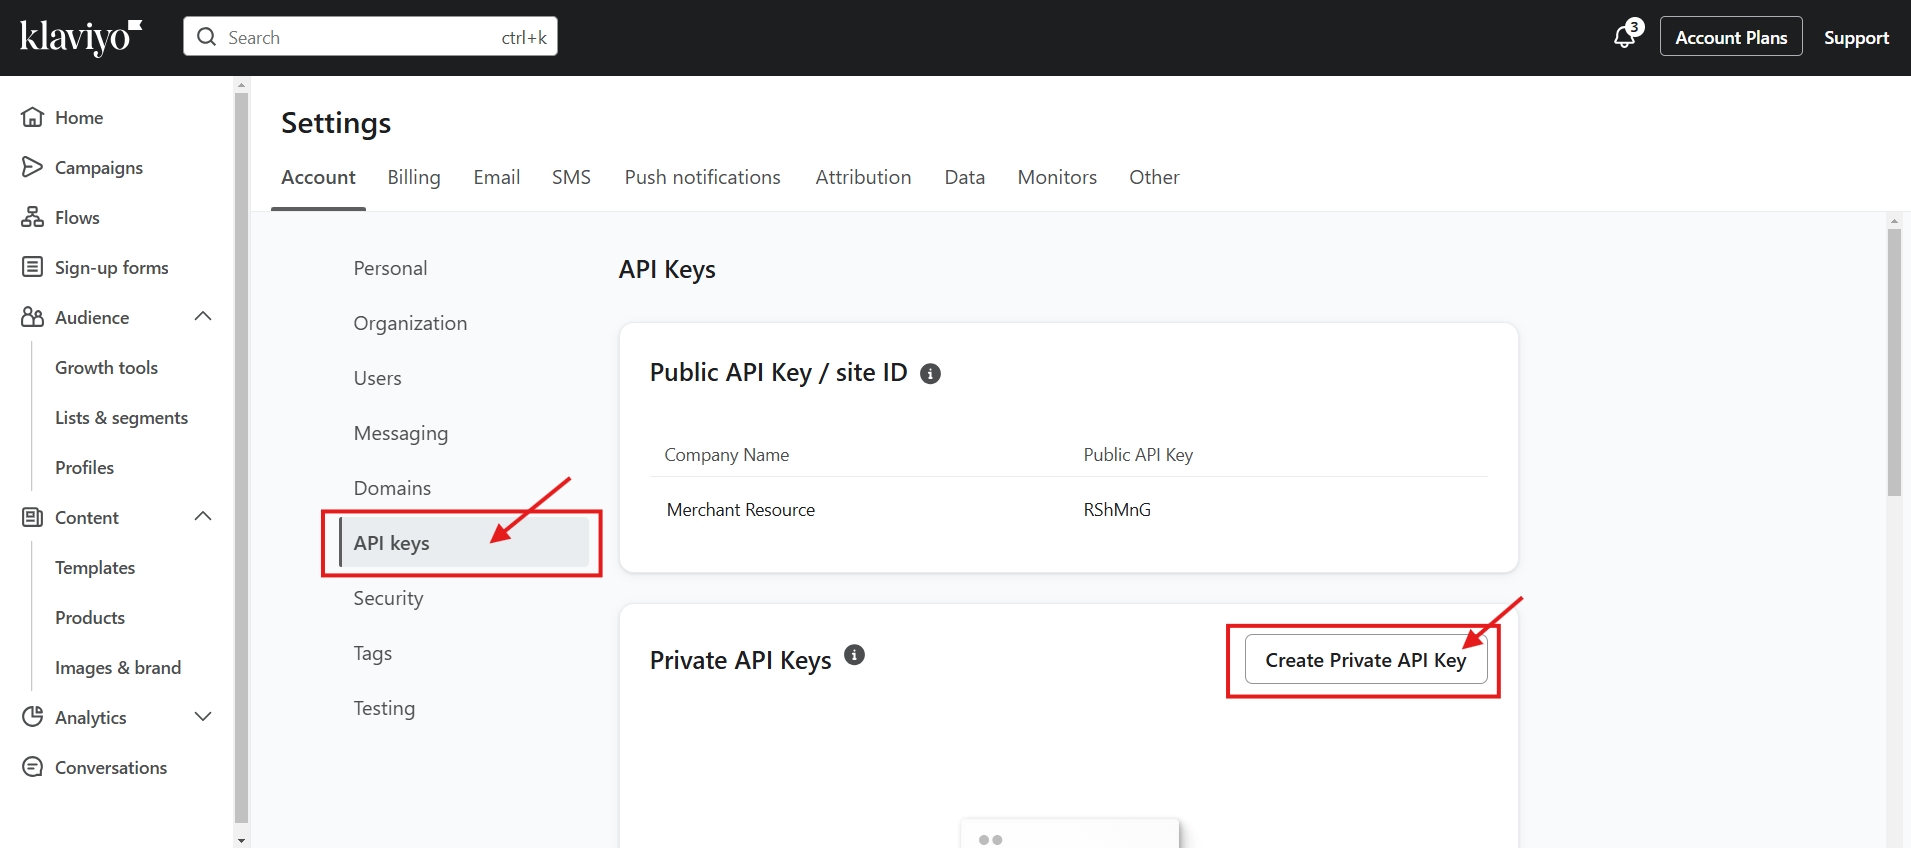
Step 2
Select API keys: Once you've navigated to settings select API keys > select Create Private API Key
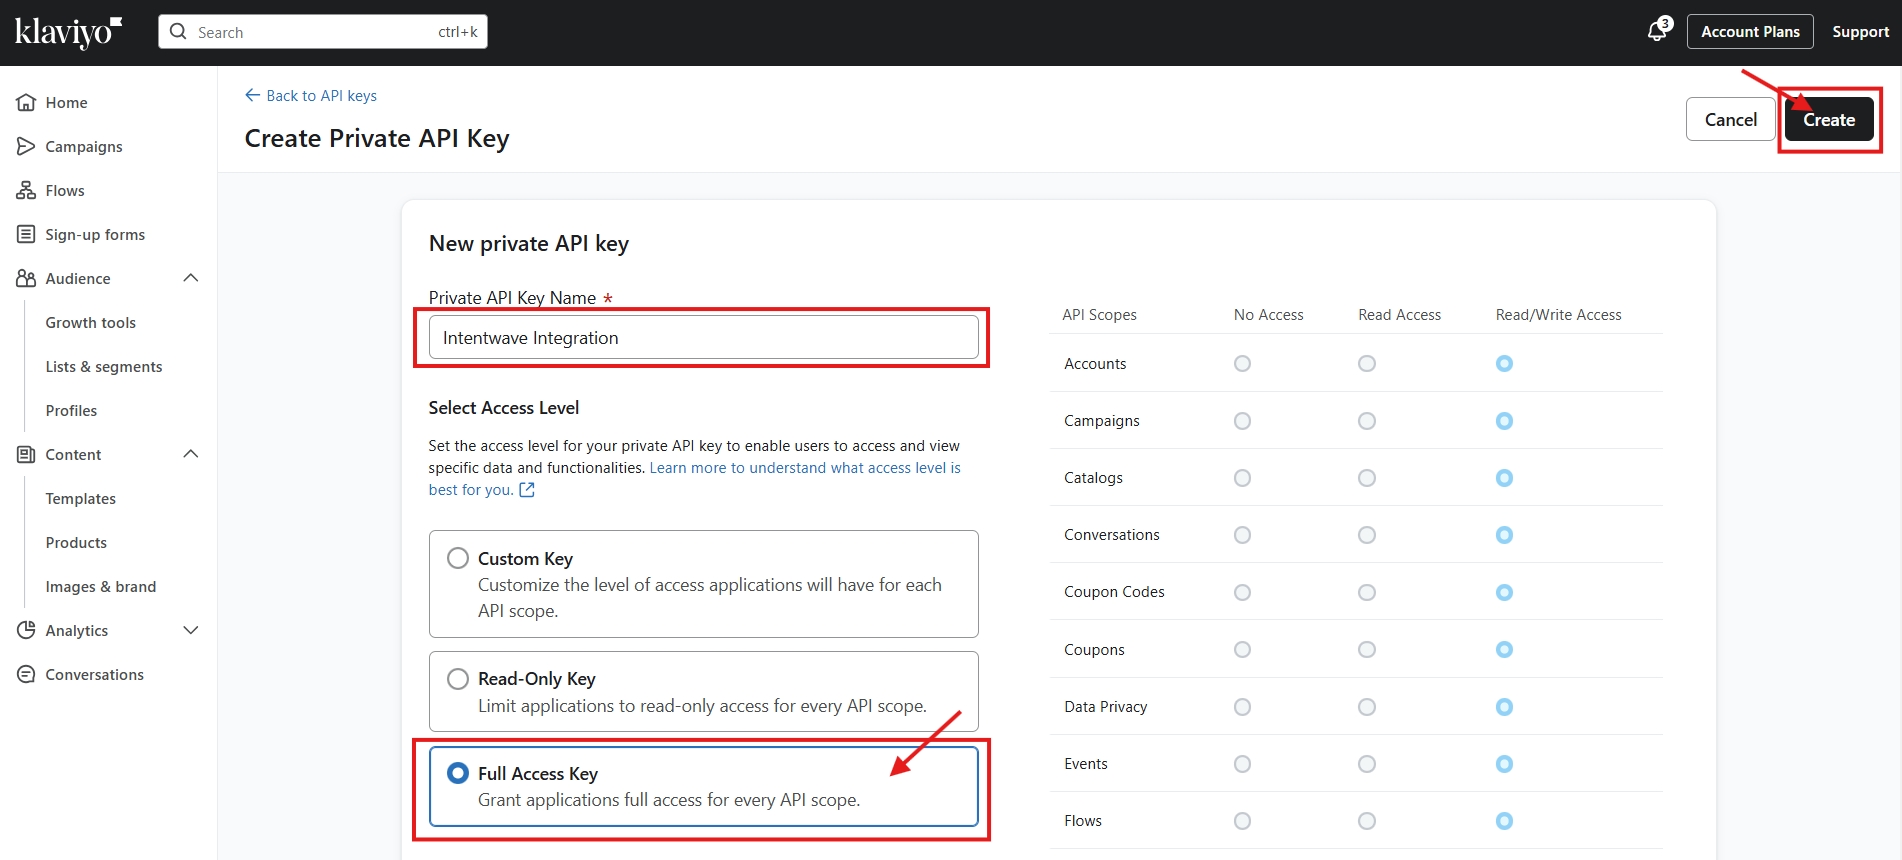
Step 3
Create your Private API Key: Give your New private API Key a name > select Full Access Key > select Create
Step 4
Copy your new API key: Select the copy icon and securely store your API key so you don't forget it

Step 5
Navigate to Integrations: Go to your Intentwave dashboard and select Integration > select Klaviyo

Step 6
Paste You API Key: Toggle the enabled button to on > paste your Klaviyo Private API Key into the API Key section > if you don't want to add to a specific list Save Changes and your all set. (Jump to step 10 to test your integration)

Step 7
Add to a list in Klaviyo: Navigate back to Klaviyo and select or create a new list you want your consented identified visitors to be stored in > select the dotted icon > List settings

Step 8
Copy and paste your list ID: Copy your list ID > paste into your Intenwave dashboard under the List ID section > Save Changes


Step 9
Test your Integration: Select the Test Integration Icon to test if you set up your Integration correctly

Congratulations on setting up your Klaviyo Integration and getting one step closer to turning Consnet into Commerce with Intentwave!
If you need support contact us at [email protected]
Last updated